 Figure 4-31 Defining the name field
If you are continuing the tutorial from the previous exercise, you may already be in the application enter script.
Make sure you are in the Enter Script and move to the end of the line:
call show_window ("information");
and do the following:
call current_window ("information", "name");
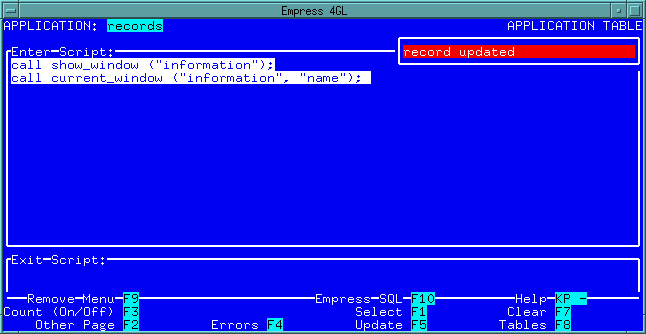 Figure 4-30 New Enter Script
Switch to the FIELD TABLE by pressing the Tables and Field keys.
We are now going to define the fields that are to be accessible. If a field is not defined in the FIELD TABLE, or is defined with mode "s", then you will not be able enter that field to type new data when you run the application.
Enter the following data:
Figure 4-31 Defining the name field
Press the Insert key to insert this record. Now the name field is defined.
Press the Clear key to clear the screen and enter the following information:
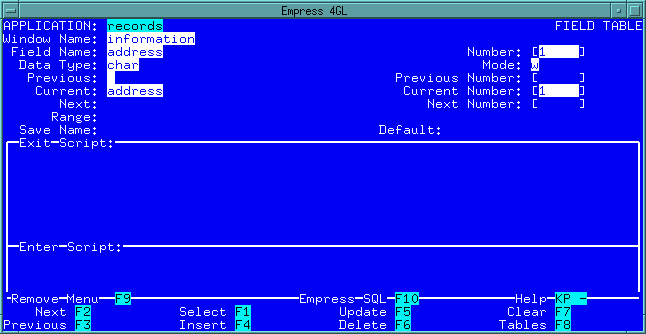 Figure 4-32 Defining the address field
Press the Insert key to insert the address field record.
Press the Clear key to clear the screen and enter the following information:
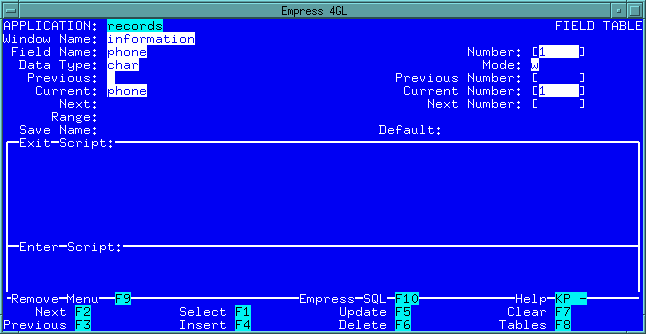 Figure 4-33 Defining the phone field
Press the Insert key to insert the phone field record.
For a detailed description of the FIELD TABLE, please refer to Empress 4GL: Tool Reference Manual.
Again, press Table key then the Compile, Link and Run keys.
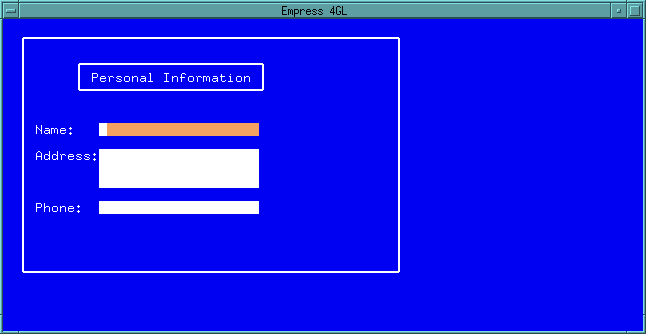 Figure 4-34 Personal Application
The same application records is on the screen, but this time you can move around the fields by pressing the Next field and Previous field keys. At this point, you can also type something into the field and see how it scrolls within the field. If you remember the Help key, press it, you will see the Help screen for the Field Editor. These are the things that you can do at the moment.
Take special note of the Insert/replace mode key. Pressing this key toggles the insert mode on and off. You will need to turn this mode on in order to type more than one line in a field.
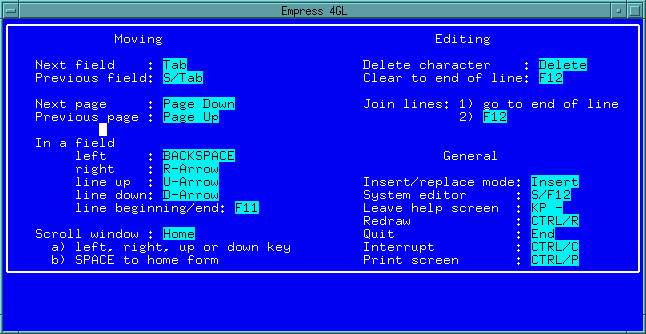 Figure 4-35 Help Screen
Press the Help key again to remove the Help screen and return to your application.
Press the Quit key (and answer the prompt by typing y) to leave the application and go back to the TABLES Menu.
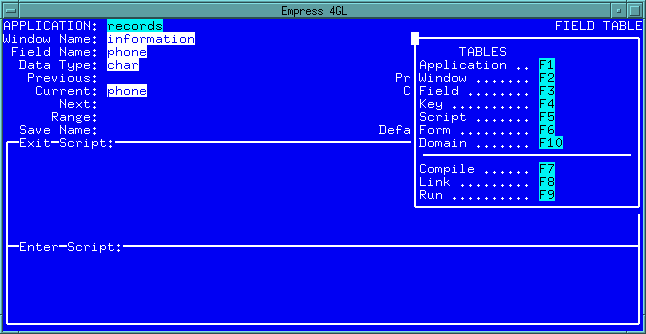 Figure 4-36 Tables Menu
4.5.1 Field Scripts
The following steps will show you how scripts can be associated with fields.
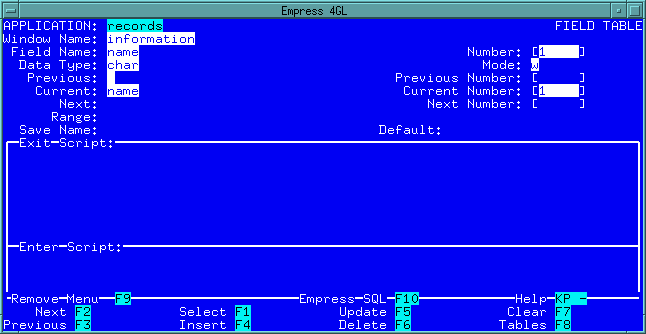 Figure 4-37 Field Table name field record
if ('information'@'name'= null)
   call error_message ("Null value, Please Enter Name");
end;
Press the Insert/replace Mode key.
call info_message ("Please Enter Name");
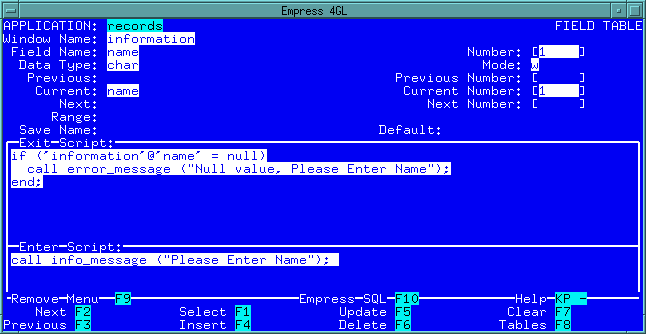 Figure 4-38
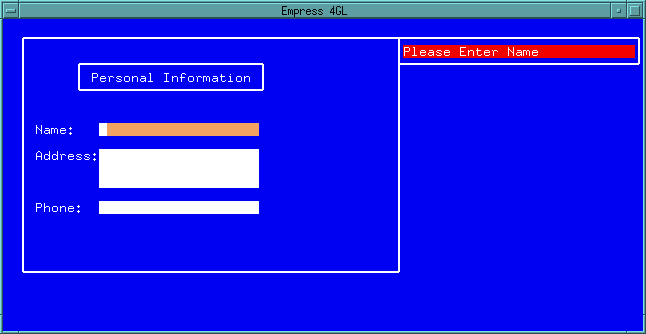 Figure 4-39 Personal Application
The Field Exit Script will be executed when the cursor leaves the field. Try leaving the field by pressing the Next field key now.
When an error is detected, the error_message () function will issue a beeping sound and prints the error message. The cursor will remain in the same field.
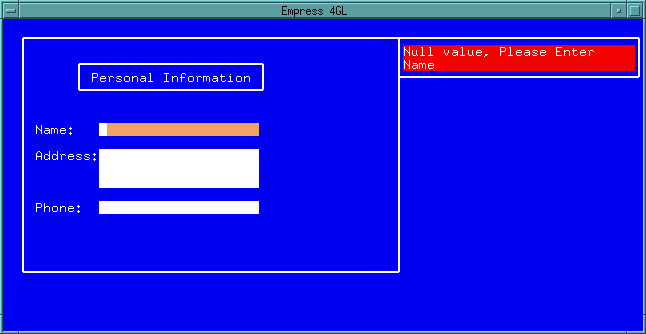 Figure 4-40
Press the Quit key and respond "y" to the query to leave the application. Press the Quit key three more times to return to the Main Menu.
In this section, we have shown you how to define the fields in the FIELD TABLE and how the field scripts can be associated with each field.
In order to remind ourselves of which key has been assigned the new functionality, we will add a field in the form personal and display the key label in it.
From the Main Menu, go to the Form Manager and press the Edit key to edit the personnel form:
 Figure 4-41
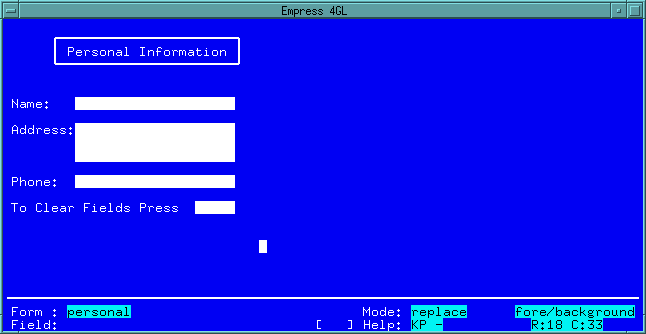 Figure 4-42
Note: We have created the field with a width of only five characters because it serves the purpose of this tutorial. In reality, you should make the "key label fields" as long as the largest foreseeable key label. For example, the key "Down-Arrow" has 10 characters and it is possible that the key is mapped to this label on an NCD X-Terminal while it is mapped to "F1" on a Sparc station.
If the key maps to a particularly long label, it will not be entirely visible if the field is too short.
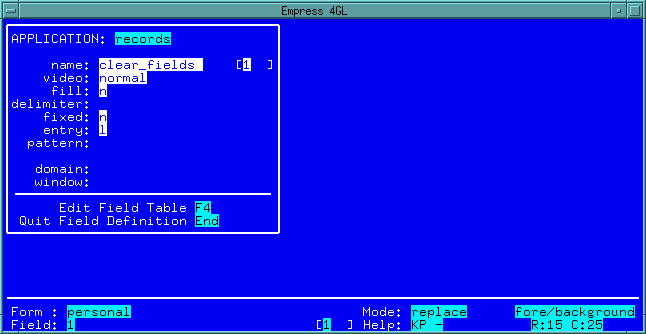 Figure 4-43 clear_fields Definition
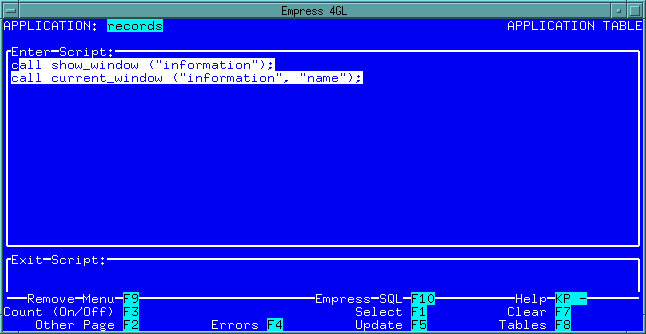 Figure 4-44 Application Table
The cursor is in the Enter Script, move the cursor to the end of the line:
call show_window ('information');
and do the following:
let 'information'@'clear_fields' = key_name ("AP_1");
This assigns the key label on the screen.
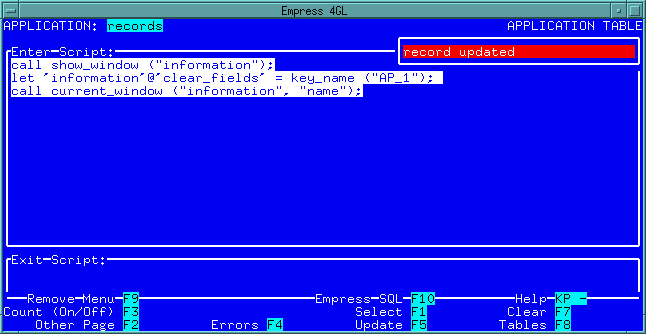 Figure 4-45
Each field in an application is identified by specifying its name and form instance name as in 'form_instance'@'field'. The form instance name can be any string of printable characters and is defined in the WINDOW TABLE.
Many windows may use the same form instance name. If this is the case, then every field with the same name and form instance have the same contents.
If the form instance name field in the WINDOW TABLE is left blank, then it defaults to the window name.
Since all window names in an application are unique, this guarantees that every field in every window has a unique value.
In general, the form instance field of the WINDOW TABLE is not filled in and the default value is used. Since the default value is the name of the window, it is common to confuse the form instance name with the window name and incorrectly refer to the fields as 'window'@'field'.
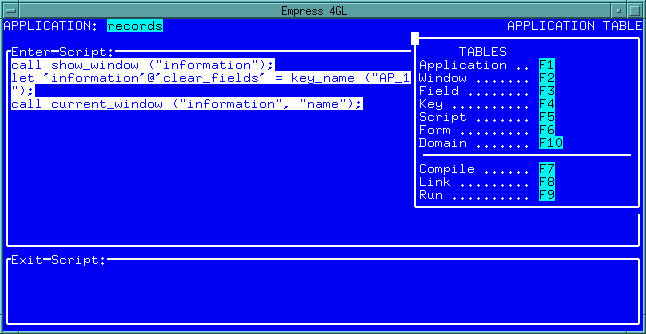 Figure 4-46 Application Table
The key script is defined in the KEY TABLE. In this example, when you press To Clear Fields Press key, it will clear all the fields in the information window of the records application. To do this, we have to define the script for the key.
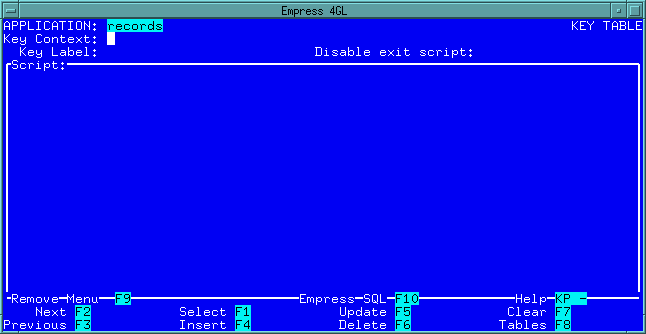 Figure 4-47 Key Table
call clear_fields ();
let 'information'@'clear_fields' = key_name ("AP_1");
Press Insert/replace Mode key.
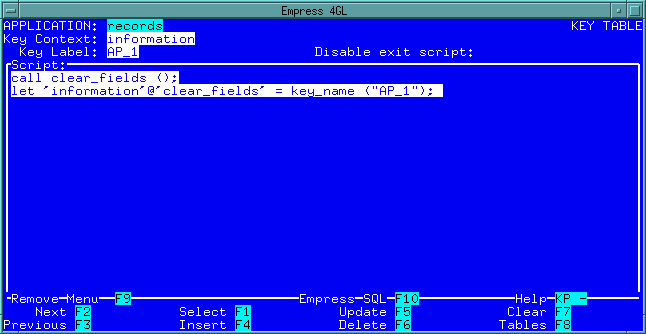 Figure 4-48 Main Menu
The clear_fields () function clears all the fields in the current window. This includes the field that shows the To Clear Fields Press key, that is why the statement to assign the key name is necessary. A better way of displaying keys is to put all the key labels on a separate form.
Note: It is not necessary to define the field which will contain the function key label for the To Clear Field Press key in the Field Table.
Go to the TABLES Menu and compile, link and run the personnel application.
You can type in some data in the fields and press the To Clear field Press key.
When you press each function key, the key script associated with the function key which is defined in the KEY TABLE will be executed.
Press the Quit key until you reach the Empress 4GL Development Main Menu.
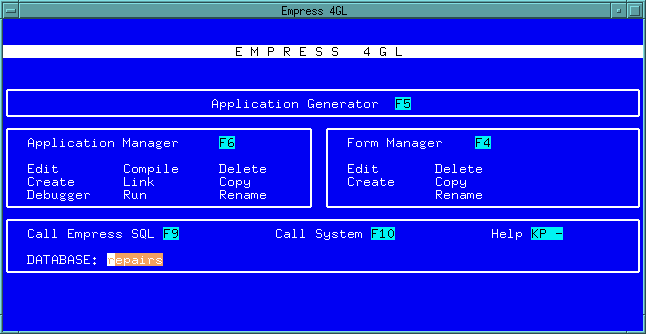 Figure 4-49 Main Menu
In this section, we have shown you how to run a script from your application by pressing a function key.